Prepare a small practice project
Use a photo you own and work on a duplicate. For this exercise, choose a modest JPEG or PNG rather than a large client PSD. Your goal is a title card with a photograph, an editable heading and a color adjustment.
Install the desktop app using the guide for your platform. Menu names below use English; translations and placement can differ by release. This walkthrough is based on upstream documentation and screenshots, not a claim that every step has been tested on every operating system.
1. Open a photo and find your workspace
Choose File → Open and select your practice image. The canvas is the working area; the toolbar selects tools; the Layers panel holds the parts of your composition. Locate History so you can inspect and undo changes.
- Check the image dimensions before editing.
- Find the image layer in Layers and select it.
- Duplicate the layer with Ctrl + J on Windows/Linux or ⌘ + J on macOS.
- Give the copy a meaningful name, such as “Photo edit”. Keep the original layer available for comparison.
2. Adjust color without overwriting the photo
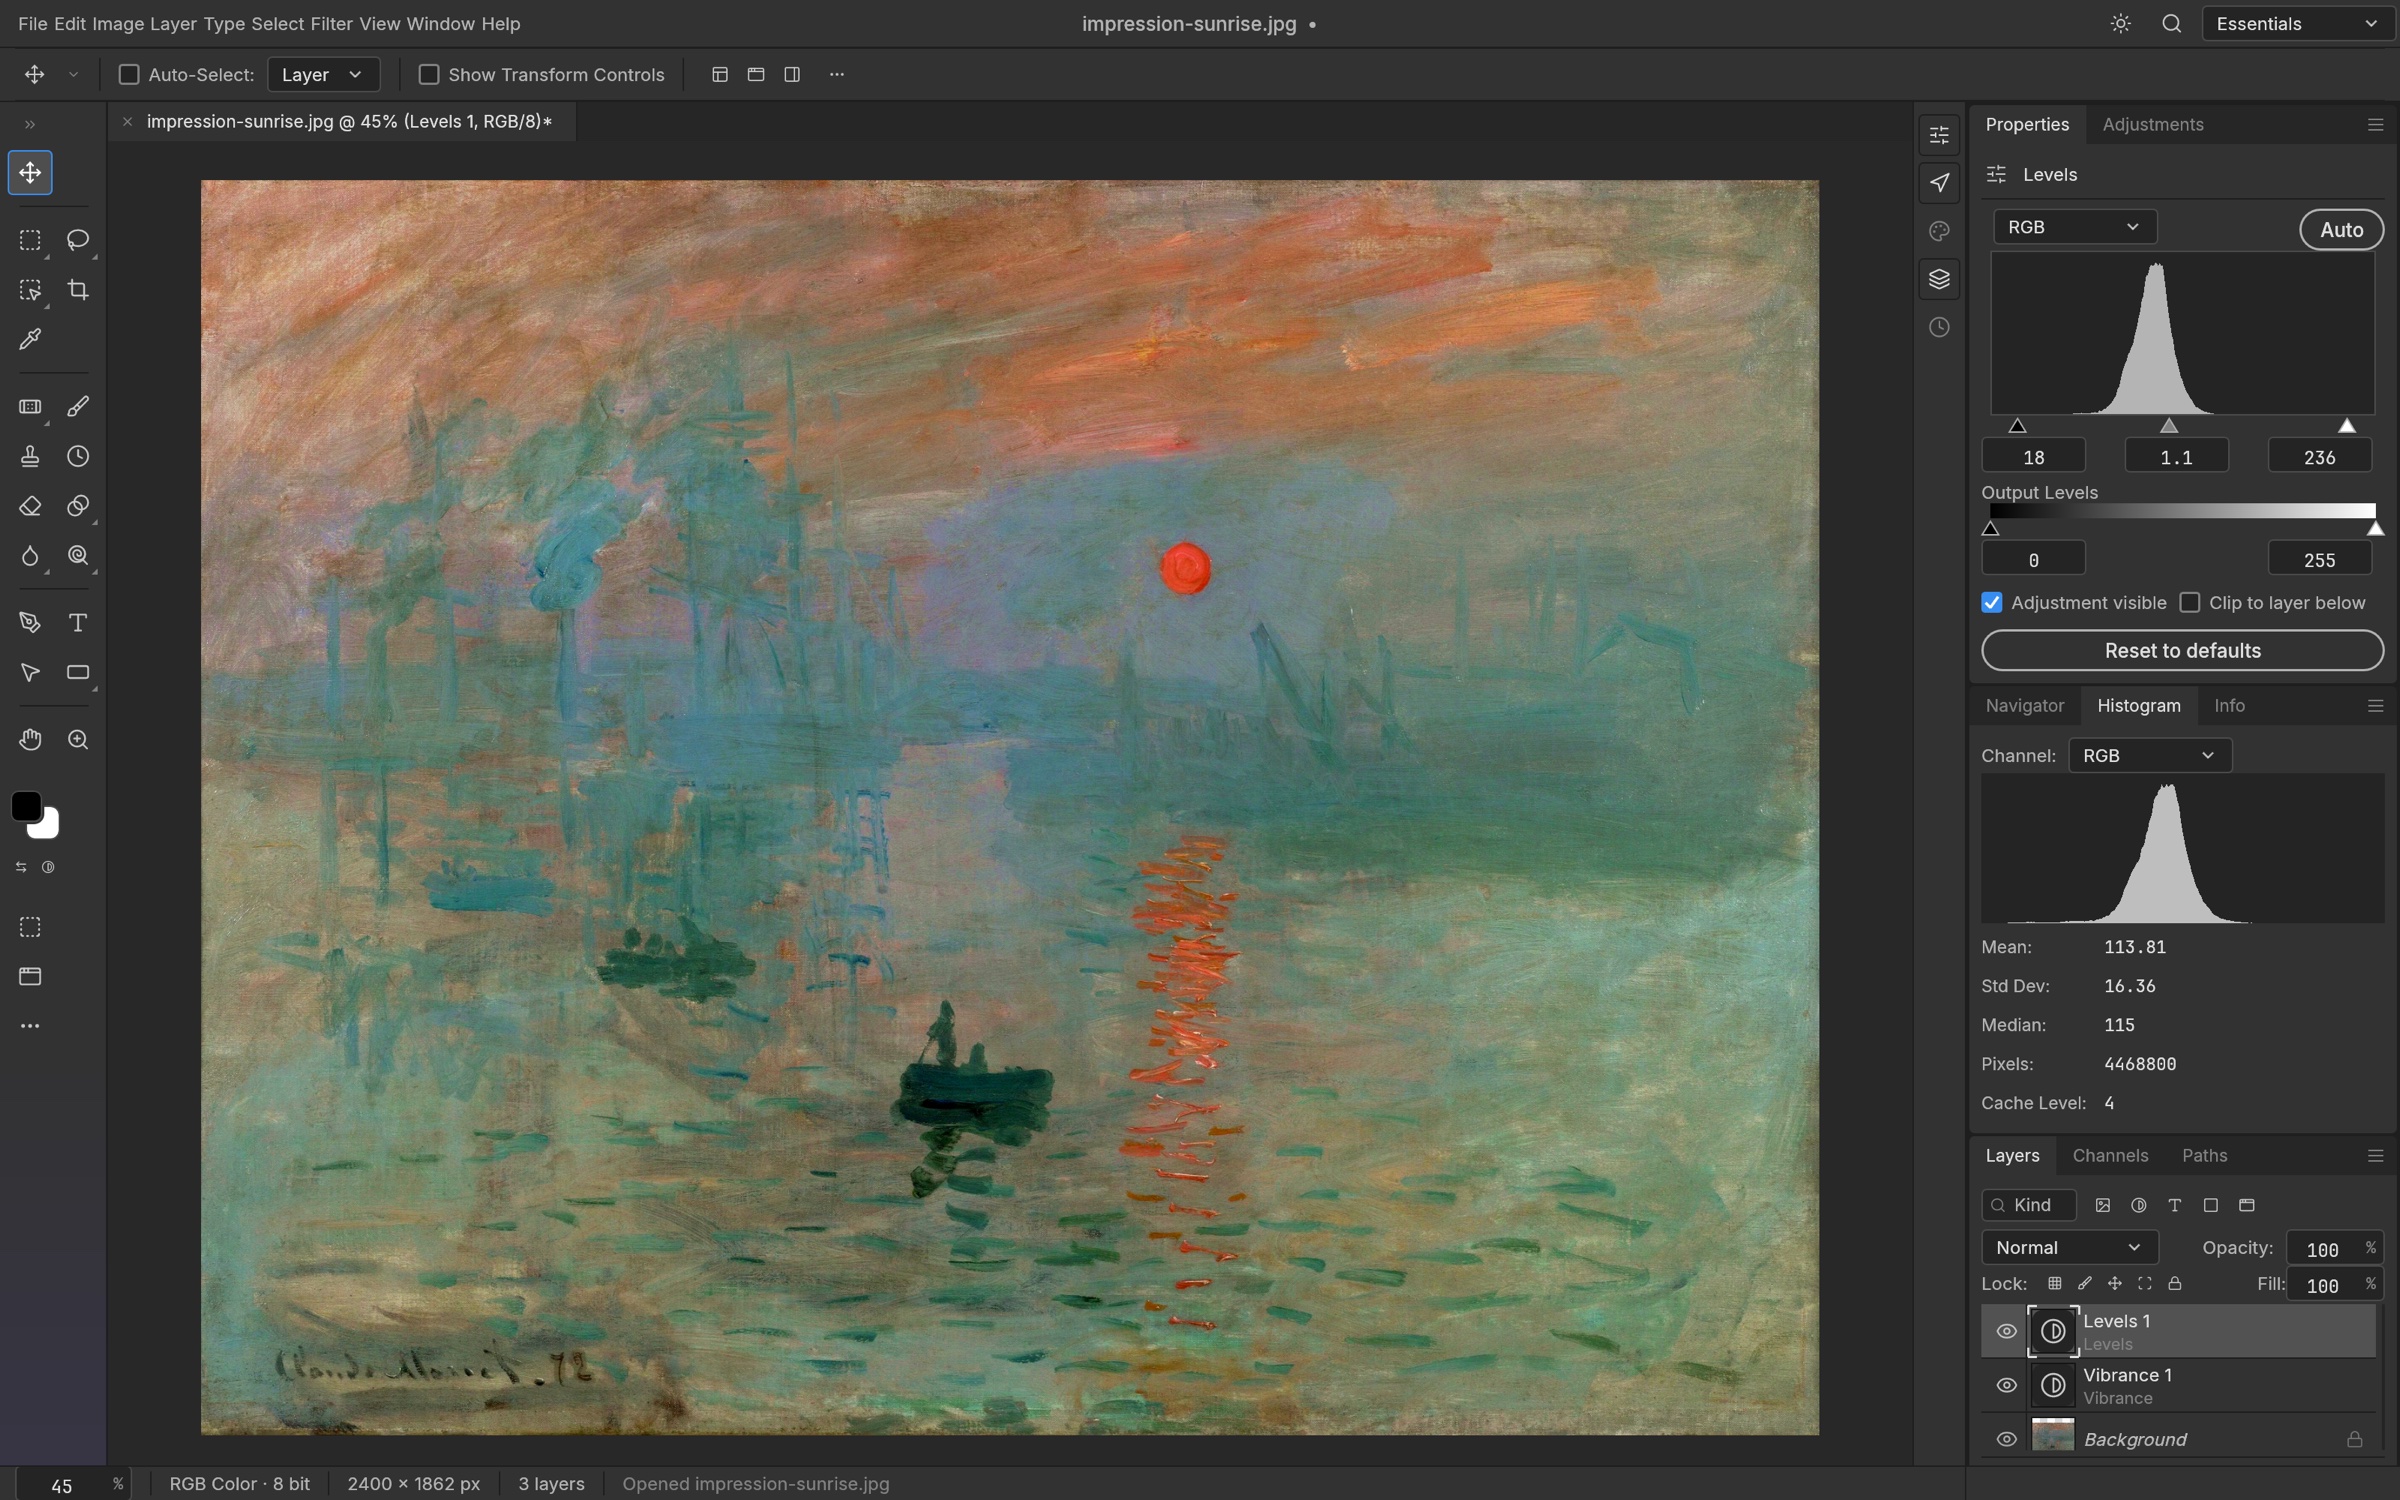
Choose Layer → New Adjustment Layer → Curves. Start with a small curve adjustment; compare the result by switching the adjustment layer’s visibility off and on. If the result is too strong, reduce the layer opacity rather than repeatedly applying a destructive correction.
An adjustment layer separates the instruction from the photo. Keep it as a separate layer while you experiment. The official example below shows adjustment layers and histogram controls; it is an upstream example, not the result of this exercise.
3. Add a heading on its own layer
Select the Type tool, click the canvas and enter a short heading. Choose an installed font and a readable size. Keep the heading inside the canvas edges. In Layers, verify that it remains a text layer rather than merging it into the photograph.
Try moving the heading over a quieter part of the photo. If your chosen font is unavailable on another machine, its appearance can change. For a shared project, record the font family and check the document on the receiving system.
4. Save the project, then export an image
- Use Save As to save a new editable project. Choose a format offered by your installed build; keep a separate PSD copy if Photoshop interchange is your goal.
- Use Export As for the finished image. PNG is useful when you need transparency; JPEG is useful for a photographic image without transparency.
- Review dimensions and quality in the export dialog. Save to a new filename.
- Open the exported image outside the editor, then reopen the editable project. Check text, layers and color.
A JPEG export is not your editable master. Keep both the project and the exported image.
Before you call it finished
- The original photo is preserved.
- The title remains editable in the project.
- The export has the intended dimensions and background.
- The saved project reopens correctly.
- Any important PSD has been checked against a reference rendering.
Sources & scope
Written from official documentation and editorial guidance. Not an exhaustive compatibility test. Menu names and behavior can change between releases.